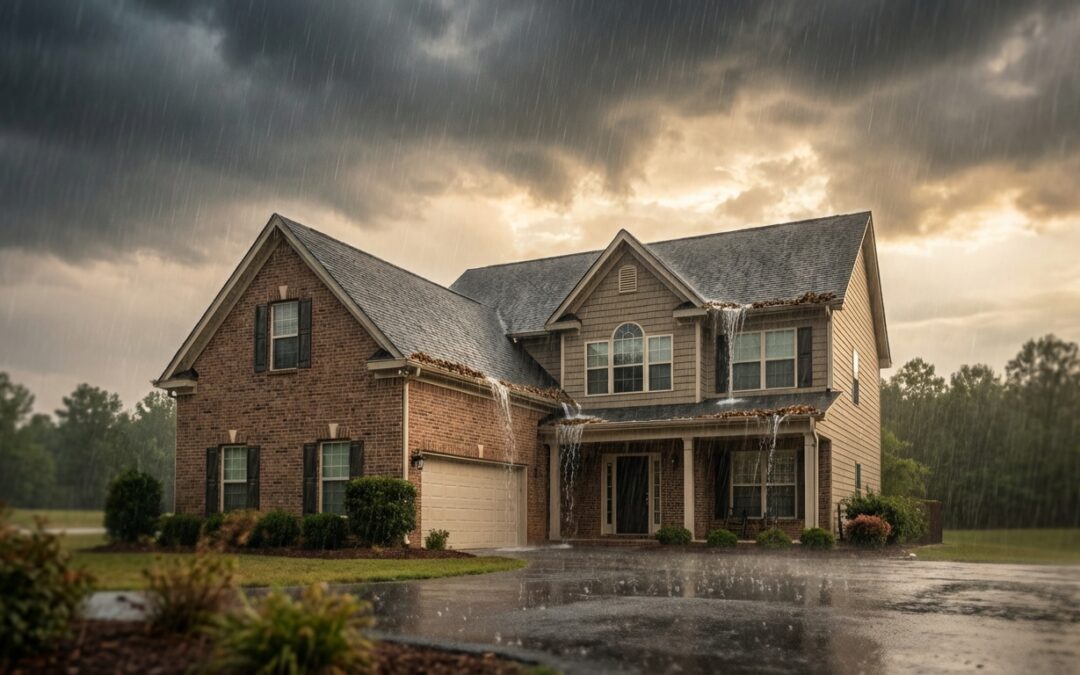
In Georgia, a roof can look perfectly fine from the street and still be one hard rain away from a ceiling stain. That’s because the same weather patterns that make our state lush and green—humid summers, sudden thunderstorms, tropical remnants, and occasional winter freezes—also exploit small weaknesses in roofing systems. Many leaks don’t start as dramatic failures; they begin as tiny gaps, aging seals, or a lifted shingle that only shows its impact when wind-driven rain finds the right angle.
The good news is that most roof leaks are preventable when you know what to look for. The challenge is that water rarely enters directly above the stain you see inside. It can travel along decking, rafters, insulation, and even wiring before it shows up in a hallway or bedroom. That’s why understanding the most common leak sources in Georgia homes is the first step to stopping damage early—before it becomes mold, rot, or expensive structural repairs.
Below are the top five causes of roof leaks we see most often across Georgia, along with practical ways to diagnose them, reduce risk, and decide when it’s time to call a professional. Whether you’re in metro Atlanta, the North Georgia foothills, coastal communities, or anywhere in between, these are the issues that repeatedly show up when roofs meet real-world weather.
1) Storm Damage and Wind-Driven Rain
Georgia storms don’t always need hail to cause a leak. Straight-line winds, gust fronts, and thunderstorm microbursts can lift shingles, break seals, and create small openings where rain can be forced upward and sideways. Wind-driven rain is especially sneaky because it can bypass normal “gravity-only” drainage paths and push water under shingles, into valleys, and around flashing.
In many neighborhoods, homeowners first notice a leak after a storm that didn’t seem “that bad.” A common scenario is a late-afternoon downpour with strong gusts: the next morning, there’s a faint brown ring on the ceiling or a damp spot near a window or fireplace. Often, the roof is still mostly intact, but one or two compromised areas are enough to let water in.
Storm-related leaks also tend to compound over time. A lifted shingle may settle back down visually, but the adhesive strip can be broken and the fasteners may be loosened. Then the next storm hits, and the same spot opens again—wider—allowing more water intrusion and faster deterioration of the roof deck.
Common storm-related leak points
Wind and heavy rain typically exploit transition areas and edges first. Roof perimeters, ridges, hips, and valleys take the brunt of uplift forces. If your roof has architectural features like dormers, skylights, chimneys, and multiple roof planes, those intersections can become high-risk zones during storms.
Another frequent culprit is debris impact. Georgia’s tree canopy is beautiful, but branches can scrape shingles, puncture roofing materials, or clog valleys and gutters. Even if the branch doesn’t fall through the roof, repeated rubbing can remove protective granules and shorten shingle life, making leaks more likely.
Actionable tips after a storm
- Do a safe ground-level inspection: Look for missing shingles, lifted tabs, exposed underlayment, bent flashing, and debris buildup in valleys.
- Check your attic within 24–48 hours: Use a flashlight to look for wet insulation, darkened wood, or active drips—especially near roof penetrations and valleys.
- Document everything: Take photos of visible damage for insurance purposes, including downed limbs and close-ups of affected areas (from the ground).
- Don’t delay temporary protection: If you suspect active leaking, tarping or temporary sealing can prevent secondary damage while you schedule repairs.
Real example: A homeowner in Cobb County noticed water staining near a second-floor bathroom after a line of storms. The roof looked fine from the driveway. A closer inspection revealed a few shingles near a valley had lifted just enough for wind-driven rain to enter. The fix was targeted—replacing damaged shingles and resealing the valley area—far less costly than waiting until the decking softened and required replacement.
2) Aging or Improperly Installed Flashing
Flashing is the thin metal (or specialized membrane) that seals transitions where the roof meets something else—chimneys, walls, skylights, vents, and valleys. In Georgia homes, flashing failures are one of the most common sources of persistent, recurring leaks. Even a high-quality shingle roof can leak if flashing is missing, corroded, poorly integrated, or incorrectly layered with the underlayment.
Over time, flashing can separate due to thermal expansion, wind movement, and normal settling of the home. Sealants used around flashing can also dry out and crack under UV exposure and heat—both of which are abundant in Georgia summers. Once sealant fails, water can slip behind flashing and enter the roof assembly.
Installation quality matters just as much as material quality. If step flashing (used where a roof meets a vertical wall) isn’t properly interwoven with shingles, water can run behind the system. Similarly, chimney flashing requires correct layering of base flashing, step flashing, and counterflashing. Missing counterflashing is a frequent issue that leads to leaks around brick chimneys.
Where flashing leaks show up inside
Flashing-related leaks often appear as stains on ceilings or walls near chimneys, around skylight shafts, or along exterior walls where rooflines intersect. In two-story homes, you might see water spots on an upstairs ceiling near a dormer or a wet patch on a wall that seems unrelated to the roof. Because water can travel along framing, the visible stain may be several feet away from the actual flashing failure.
In many cases, homeowners also notice musty odors in closets or upper corners of rooms. That’s because slow flashing leaks can dampen insulation and framing long before dripping becomes obvious, creating conditions favorable for mold growth.
How to reduce flashing-related risk
- Prioritize flashing during roof replacement: Ask your contractor whether chimney, wall, and valley flashing will be replaced—not just re-used.
- Be cautious with “tar fixes”: Roof cement may provide short-term relief but often fails and can trap water or hide underlying issues.
- Inspect after exterior work: New siding, gutters, solar installs, or painting can disturb flashing details if not handled carefully.
- Schedule periodic professional inspections: A roofer can spot early separation, rust, or missing counterflashing before it becomes an interior leak.
Real example: In a historic home near Savannah, a recurring leak near a fireplace was “patched” repeatedly with sealant. The real issue was deteriorated counterflashing and mortar joints at the chimney. Once the flashing system was properly rebuilt and integrated with the roof, the leak stopped—and the homeowner avoided ongoing ceiling repairs.
3) Clogged Gutters, Poor Drainage, and Roof Valleys
Georgia’s pine needles, oak leaves, and seasonal pollen can overwhelm gutters fast—especially in wooded neighborhoods. When gutters clog, water can back up under shingles at the roof edge, saturate fascia boards, and seep into soffits and wall cavities. This is a common cause of leaks that appear near exterior walls or along the perimeter of upper-floor rooms.
Poor drainage isn’t only about gutters. Roof valleys—where two roof planes meet—are designed to channel large volumes of water. If valleys collect debris, water slows down, pools, and finds seams. Even a small dam of leaves can redirect water sideways under shingles, particularly during heavy rains.
In metro areas like Atlanta and Augusta, sudden downpours can dump a lot of water in a short time. If gutters are undersized, improperly pitched, or missing downspout extensions, water can overflow and repeatedly soak the same roof edges and wall sections. Over time, that constant moisture increases the likelihood of rot and leaks.
Warning signs of drainage problems
Outside, look for gutters overflowing during rain, water staining on fascia, peeling paint near roof edges, or plants growing in gutters. Inside, watch for ceiling stains near exterior walls, damp spots at the top corners of rooms, or bubbling paint on upper walls.
Another sign is granule accumulation in gutters. While some granules are normal on aging shingles, heavy accumulation can indicate accelerated shingle wear—often worsened by standing water and poor drainage patterns.
Actionable maintenance steps (Georgia-friendly)
- Clean gutters at least twice a year: Typically late spring (after pollen season) and late fall (after leaves drop). Heavily wooded lots may need more.
- Install gutter guards strategically: Guards can reduce debris but still require periodic checks, especially with pine needles.
- Check downspout discharge: Ensure water is directed away from the foundation with extensions or splash blocks.
- Keep valleys clear: From the ground, look for visible debris lines in valleys and remove safely or hire a pro.
Real example: A homeowner in Gwinnett County experienced intermittent leaks along an upstairs exterior wall only during the heaviest rains. The culprit was a clogged valley feeding into an already backed-up gutter. Once the valley was cleared and the gutter system corrected for pitch and flow, the leak stopped without any major roof replacement.
4) Roof Penetrations: Vents, Plumbing Boots, Skylights, and Satellite Mounts
Every penetration through the roof is a potential leak point. Georgia homes commonly have multiple roof vents, plumbing stacks, bathroom fan exhausts, and sometimes skylights or solar/satellite mounts. These areas rely on rubber boots, gaskets, flashing collars, and sealants that degrade over time—especially under intense sun and heat.
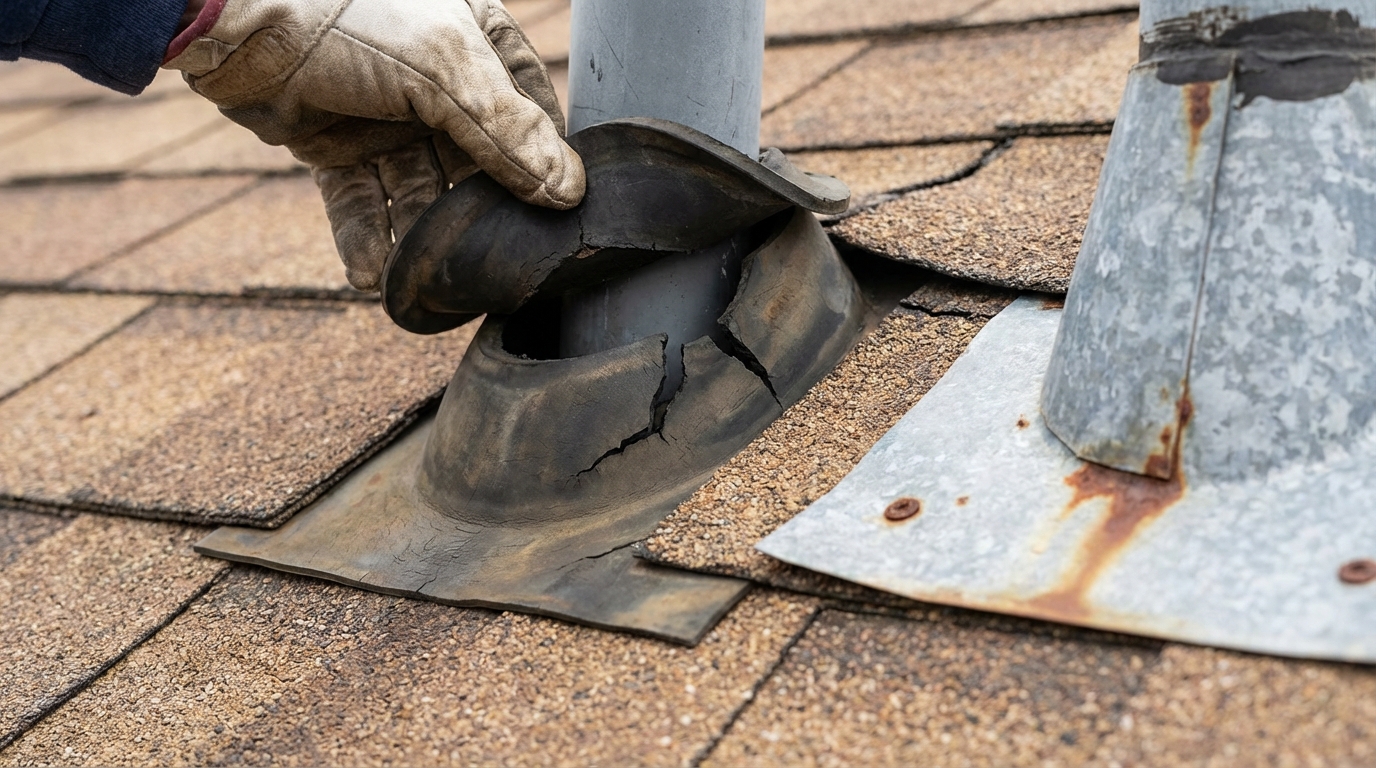
Plumbing vent boots are one of the most frequent leak sources because the rubber can crack, split, or pull away from the pipe. Once that happens, rainwater can run straight down into the attic space. Homeowners often notice leaks near bathrooms or hallways because vent stacks are commonly routed through those areas.
Skylights are another common culprit—not because skylights are “bad,” but because they require precise flashing and integration with the roofing system. In humid climates, skylight condensation can also be mistaken for a roof leak, so diagnosis matters. A professional inspection can determine whether the moisture is coming from failed flashing, a skylight seal, or indoor humidity condensing on cold surfaces.
How penetrations fail in real life
In many cases, the roof covering around a penetration is still in decent shape, but the accessory component has aged out. For example, a 10–12-year-old roof may still have serviceable shingles, yet the vent boot rubber has become brittle and cracked. That’s why “spot repairs” can be highly effective when caught early.
Another scenario involves third-party installations. A satellite dish mount, holiday light anchor, or solar bracket installed without proper flashing can create a direct path for water. Even small screw holes can lead to slow leaks that show up months later as staining or musty odors.
Tips to prevent penetration leaks
- Inspect vent boots annually: From the ground, look for cracked rubber, gaps, or rusted flashing bases.
- Use proper flashing for mounts: Any roof-mounted hardware should be installed with manufacturer-approved flashing systems—not just sealant.
- Address bathroom ventilation: Ensure fans vent to the exterior (not into the attic) to reduce moisture that can mimic or worsen leak symptoms.
- Don’t ignore small stains: Early water marks near bathrooms or skylights often indicate a penetration issue that’s relatively straightforward to fix.
Real example: In a home outside Athens, a homeowner noticed a small drip near a hallway light after rain. The roof was only eight years old. The issue turned out to be a cracked plumbing boot around a vent pipe. Replacing the boot and inspecting nearby penetrations prevented further damage and avoided a much larger repair bill.
5) Moisture, Ventilation Issues, and Georgia’s Freeze-Thaw Surprises
Not all “roof leaks” are caused by rain entering from above. In Georgia’s humid climate, moisture problems inside the attic can create water-related symptoms that look like leaks—especially when ventilation is inadequate. Warm, moist air from bathrooms, kitchens, and laundry areas can rise into the attic and condense on cooler surfaces, leading to damp insulation, mold growth, and water staining on ceilings.
Ventilation matters because it helps regulate attic temperature and moisture levels. Without balanced intake and exhaust ventilation, heat builds up in summer and can accelerate shingle aging, dry out seals, and warp decking. In winter, even though Georgia winters are generally mild, cold snaps do happen. When attic temperatures fluctuate and moisture is present, condensation can increase and create dripping that homeowners assume is a roof failure.
Freeze-thaw cycles are less frequent here than in northern states, but they still affect certain regions—especially North Georgia. When temperatures dip below freezing and then rise, small cracks in sealants, flashing edges, or masonry around chimneys can expand. Over time, these micro-movements can open pathways for water during the next rain.
Signs your “leak” may be a ventilation or moisture problem
If you see widespread dampness rather than a single drip point—such as moisture on nails in the attic, a musty smell throughout the attic, or mold on the underside of roof decking—ventilation and indoor humidity are likely contributing factors. Another clue is timing: condensation issues may be worse during cold mornings, after showers, or during periods of high indoor humidity, even without rain.
You may also notice insulation that looks compressed or damp in multiple areas. Wet insulation loses effectiveness, which can raise heating and cooling costs and further increase humidity problems—creating a cycle that makes the attic environment harder on your roof.
Actionable steps to improve attic performance
- Confirm bathroom and dryer vents exhaust outdoors: Venting into the attic is a common cause of moisture buildup and mold.
- Check for balanced ventilation: A professional can evaluate soffit intakes, ridge vents, gable vents, and overall airflow.
- Air-seal attic penetrations: Sealing gaps around recessed lights, attic hatches, and plumbing/electrical penetrations reduces moisture migration.
- Monitor humidity: In persistently humid homes, dehumidification and HVAC tuning can reduce attic moisture load.
Real example: A homeowner in North Georgia reported “roof leaks” during cold weather, but only in the mornings. An attic inspection revealed condensation dripping from roof nails due to poor ventilation and an improperly vented bathroom fan. Correcting the fan ducting and improving airflow solved the issue without any roof replacement.
How to Respond When You Suspect a Roof Leak (Next Steps)
When you spot a stain or drip, speed matters—but so does strategy. The first goal is to prevent further damage to drywall, insulation, flooring, and electrical systems. The second goal is to identify the true source, which is often not directly above the visible interior symptom. Taking a measured approach can save time and reduce the risk of repeat repairs.
Start inside. If there’s active dripping, place a bucket and protect flooring. If the ceiling is bulging with trapped water, it may be safer to have a professional address it to avoid a sudden collapse and widespread damage. In the attic, use a bright flashlight and look for shiny wet spots, dark trails on wood, or damp insulation. Trace the water path upward and toward the roofline, keeping in mind that water can travel along rafters.
Outside, resist the temptation to climb onto the roof—especially after rain or during humid conditions when surfaces are slick. Many leak causes (missing shingles, debris in valleys, damaged flashing) can be spotted from the ground with binoculars. If you can’t confidently identify the issue, a professional inspection is the safest and most effective next step.
What to tell a roofer (to speed up diagnosis)
When you call for service, the details you provide can help pinpoint the problem faster. Note when the leak occurs (only heavy rain, wind-driven rain, or even without rain), where it appears inside, and whether you’ve had recent work done (gutters, siding, solar, HVAC, skylights). Mention any recent storms, tree impacts, or clogged gutter issues.
If you have photos of ceiling stains, attic wet spots, or exterior damage from the ground, share them. This can help the roofer prepare for likely repair scenarios—such as bringing specific flashing materials or replacement boots—reducing the number of visits needed.
Preventive checklist for Georgia homeowners
- Schedule a roof inspection: Ideally once a year and after major storms.
- Keep gutters and valleys clear: Especially after fall leaf drop and spring pollen season.
- Trim overhanging branches: Reduce debris, shading, and impact risk.
- Address small issues early: Minor flashing repairs or boot replacements can prevent major interior damage.
- Watch your attic: Periodically check for moisture, mold, and ventilation problems.
Conclusion: Key Takeaways on Georgia Roof Leaks
Roof leaks in Georgia homes are rarely random—they’re usually the result of predictable stress points meeting our specific climate. Storms and wind-driven rain can lift shingles and force water into vulnerable seams. Aging or improperly installed flashing can fail at chimneys, walls, and valleys even when shingles still look good. Clogged gutters and debris-packed valleys can back water up under roof edges. Roof penetrations like plumbing boots, vents, skylights, and mounts often degrade faster than homeowners expect. And finally, attic moisture and ventilation issues can create condensation that mimics a roof leak or accelerates real roof deterioration.
The most effective way to avoid costly repairs is to treat your roof like a system: shingles, flashing, drainage, penetrations, and attic ventilation all work together. When one part underperforms, the rest of the system is forced to compensate—until water finds a way inside. Regular inspections, timely maintenance, and professional evaluation after storms can dramatically reduce your risk.
If you’re seeing stains, musty odors, or unexplained moisture, don’t wait for the next Georgia downpour to make the problem obvious. Early action—clearing drainage paths, replacing a cracked vent boot, resealing or rebuilding flashing, and improving attic ventilation—can protect your home’s structure, indoor air quality, and long-term value.